Steep Skiing: The Downhill Ski
When things go wrong with steep skiing technique, the space-constrained uphill ski always seems to be the instigator. Who hasn't felt their uphill ski catch at the worst possible moment? And yet, as I continue to diagnose the weaknesses in my own steep technique, I find myself thinking if the uphill ski is the symptom of the problem, the downhill ski is the cure.
For the purposes of steep skiing, I'm going to argue the downhill ski plays two key roles: first, it sets the position of the body, and second, it determines the timing of the turn. When you understand this, intellectually and intuitively, and when you are able to implement it, everything else just seems to fall into place.
An Exercise
Let's begin with an exercise: find a modestly steep blue or black run that is perfectly groomed, and start making short-radius turns directly down the fall line. Former racers will be used to lifting their uphill skis to maximize pressure on the downhill edge (and step onto the new ski), but I want you to do the opposite: lift your downhill ski.
Now, there is going to be some ambiguity here because in slalom turns, uphill and downhill skis are shifting places rapidly, but here is the concept—as soon as you've pressured the downhill edge and gotten the necessary rebound, lift the downhill ski aggressively, transferring all your weight to the uphill edge of the uphill ski.
From here, you should have no problem rolling the weighted uphill ski to its downhill edge as you simultaneously initiate and execute a new turn. If that sounds weird it's not; it's just expert technique (admittedly with an extra dose of anticipation). Racers do this all the time, consciously or not. If it is a problem for you, focus on getting this right before trying anything else.
As you become more familiar and comfortable with this exercise, I want you to really lift that downhill ski. Make it obvious; make it extreme. It's an exercise—no one's watching. When you can smoothly execute the lift on both legs, turn after turn, we're going to add one more crucial modification:
Lift only the heel of the downhill ski.
That's right, glue that downhill ski tip to the snow—maintain tip pressure on the snow if you can—but lift that heel high, so the tail comes completely off the snow. See if you can get the downhill ski tail six inches off the snow. See if you can get it even higher while keeping the tip continuously on the snow. Notice how, suddenly, magically, your fall-line slalom turns improve.
Why does this happen? Because you are now using your downhill ski to set your body position and control the timing of the turn. When you get this exercise right, you may find yourself making better slalom turns than you've ever made before. But wait—it gets even better. We're going to take this same technique and discover it works like gangbusters on any pitch, however steep.
An Extreme Example
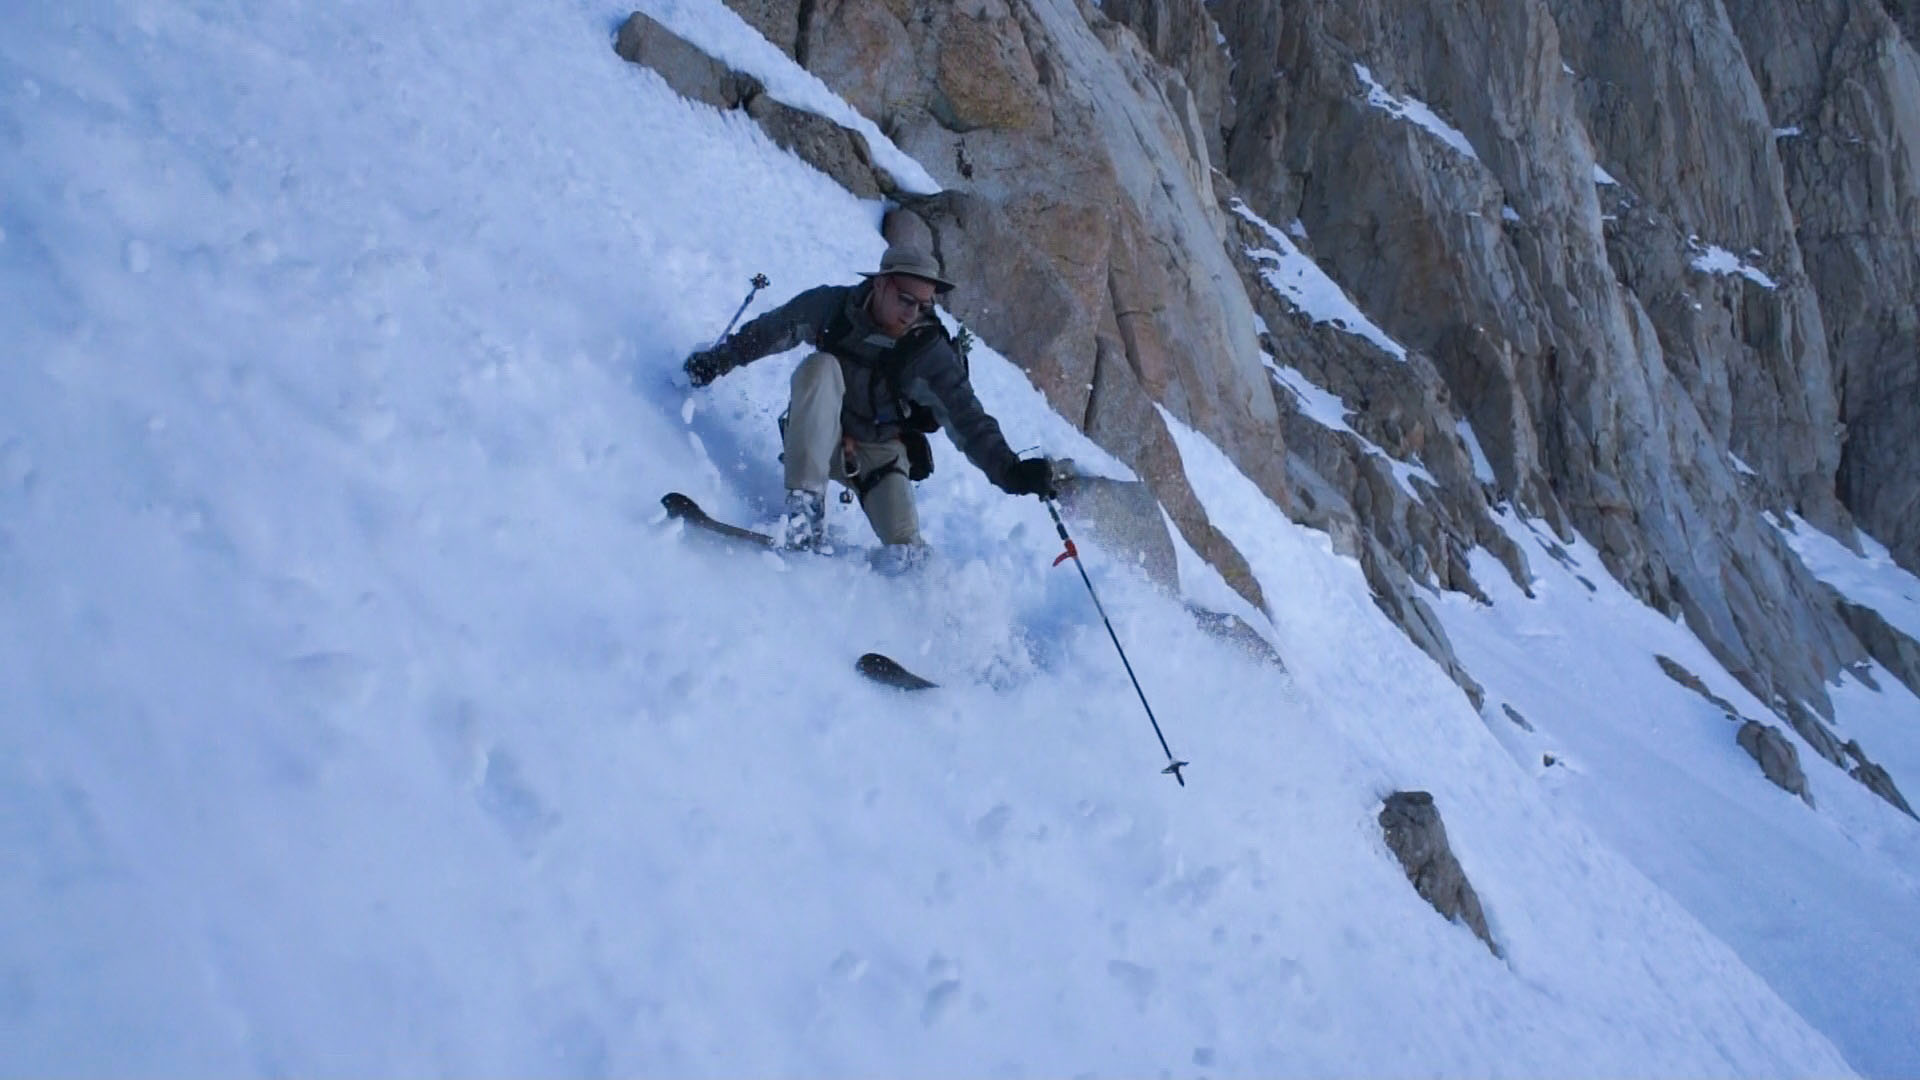
Let's look at the photo above, of Dave Braun skiing Muir's East Buttress (if you want to see this turn in real time, go to 12:01 in our Muir Disconnect video). I've frozen the frame at exactly the moment where Dave is rebounding off his lower leg—ie, initiating the new turn. Notice Dave's lower leg is (almost) fully extended, which allows him to position his body out over the lower ski.
This can be done statically before you start the turn or while you're side-slipping into a new turn. Either way, it is critical. You must get your weight on a fully-extended lower leg or else your body will be positioned too close to the hill. Extend that lower leg, weight it, and lean your torso over, right out into space!
Remember the exercise we just did? We're going to use the same motion: lift the heel of the downhill ski while keeping the tip either touching or floating just above the snow. That motion, in coordination with the impulse on the downhill leg, initiates the turn. And, keeping the tip down and lifting the ski heel up keeps the ski and body properly aligned throughout the turn.
Lift the tip of the downhill ski, in contrast, and you will finish the turn in the backseat.
The Pedal Turn
Though we're focusing on the downhill ski, let's quickly look at the uphill ski to see what it is doing. First, notice the extreme angle of Dave's knee—his uphill leg is almost completely flexed. This not only assists in positioning the body over the downhill leg, it also pre-positions the uphill ski such that almost no vertical motion is necessary to initiate the turn.
Basically, all Dave has to do from this starting position is just pivot off his downhill ski, and the uphill ski will follow around, perfectly well-behaved.
If you look at the turn in real time, in the video, you'll see that as soon as Dave's ski tips clock past the fall line he begins to extend his uphill leg (which is now the new downhill leg). Dave thus perfectly positions himself for the next turn. This extension of the uphill/new downhill leg is the 'pedaling' motion that gives the Pedal Turn its name.
Strictly speaking, you don't have to do it. You can land the turn on a bent leg. However, you will drop a longer distance, which is generally unwanted, and you'll then have to extend the new downhill leg anyhow to start the next turn, so I recommend at least experimenting with the pedaling motion (note: you may wish to avoid pedaling the uphill leg if the snow is especially grabby).
Final Thoughts
These ideas have not only improved my skiing on my favorite steep drops, they have also allowed me to look back at various videos of myself and preemptively identify which turns will go wrong. Am I weighting my uphill ski pre-initiation? There will be trouble. Does the tip rise when the downhill ski lifts? Ditto. Knowledge, in this case, is power—the power to make stronger, safer turns.
Be sure, if you haven't already, to check out the other articles in my steep skiing series, which include Principles of Steep Skiing: Revised and Uphill Ski Management. I'll continue playing around with these ideas, and refining and revising them over time. As well, we haven't yet talked about perhaps the most important subject of all: risk. I sense that discussion is now overdue.
— April 8, 2014
Andy Lewicky is the author and creator of SierraDescents
brad brown April 30, 2014 at 6:58 pm
I did an about face the other day and found my left heal got blocked by my right, on flat ground no less (try this at home with no one watching). It reminded me of your “blocking” problem but the aha moment came when I realized that it can happen regardless of slope, er sidewalk. Much of becoming an advanced skier is geared towards avoiding this dreaded condition on lesser slopes, hence being able to ski “parallel” is considered a marvel to intermediates. However, the advanced parallel turn does not completely solve tough terrain turns (slope + conditions), because of the blocking problem. Some enjoyable “research” left me thinking Plake and Lecluse (RIP) are among the elite who have acquired this master level skill. They seem to have advanced beyond the pedal turn, perhaps call it a ski mountaineers turn (SMT).
I think the modern masters avoid blocking this way: the firm pole plant directly down the fall line below, or even behind the boot, creates “angulation” so that the upper body is both twisted and angled over the skis. The upper body is approximately perpendicular to slope when viewed from the side. When viewed from above the skier the upper body approaches 90 degrees relative to the ski direction (traverse position) facing directly down the fall line. This action both winds the body up, think old school rubber band powered plane, and prepositions the body to allow skis to avoid “blocking”. The subsequent hop (more about this below), amongst other advantages, releases this stored energy which the skier supplements as needed to rotate the skis around 180 degrees (Andy Roddick employs a similar pre load on his serve). Just how is the blocking problem avoided with the SMT? To exaggerate a point, if the hop went vertical, instead of perpendicular to slope, the skis hit snow. The same thing happens when you wind up a rubber band powered plane. If moving propellers (skis) are held close and perpendicular to a wall (slope), they hit. Hold them parallel, they miss. So it seems to me there might actually be 2 “parallels” experts need to learn, traditional “parallel’ where both skis go in the same direction and the SMT “parallel” where skis more or less match slope, if only momentarily, at the end of the hop. Simply said, the bottom of the feet (skis) need to match the slope and each other or they hit-who knew (thanks sidewalk)? In less consequential slopes the hop progressively becomes more subtle unweighting leading to an edged (parallel), vs hop, turn initiation, perception of consequence being the determining factor on which is used.
More about the hop. For years whenever it gets dicey (e.g. Drop Out Chute at Mammoth, 47 degree entry, but it’s been awhile. Thankfully, Kirkwood trip allowed some “research” time.) the sense I have, as I’m trying to get the skis around, is to suck them up almost behind me. It’s part hop, part suck. The pros seems to do same. Back to the plane analogy. The traverse position is like starting with the props stuck against the wall, rotate the plane and they begin to spin. The change has to be quick though or the props would have time to start unwinding and initially hit. The same would happen to the skis without a hop combined with the suck. The sense I get is almost pulling the lower leg and foot uphill permitting slope match. The hop/suck works because it first clears the snow, then allows skis to match slope, followed by the lower body catching up with the upper body, finally positioning the skis to safely cross the fall line-the crux of the turn. It is a cautious hop though, too little and you block, too much and it’s a jump-kind of like a 4 foot putt, easy to get nervous on. Sucking the lower leg uphill mitigates uncomfortable elevation loss by allowing a soft touch down almost up the fall line. I omitted lots of relevant aspects to this discussion because I was trying to figure out specifically how the SMT avoids the “block”, so there is much more to this discussion-for an event that lasts around 1 second. Hope this advances the addiction, ah er discussion.
paulblaney February 3, 2016 at 7:33 pm
great,thank you